Creating the stg_aggr_order_payments Model
This model aggregates payment by customer_id by joining and aggregating data from the dev_payments and dev_orders models.
Follow-along video
Specifying model dependencies
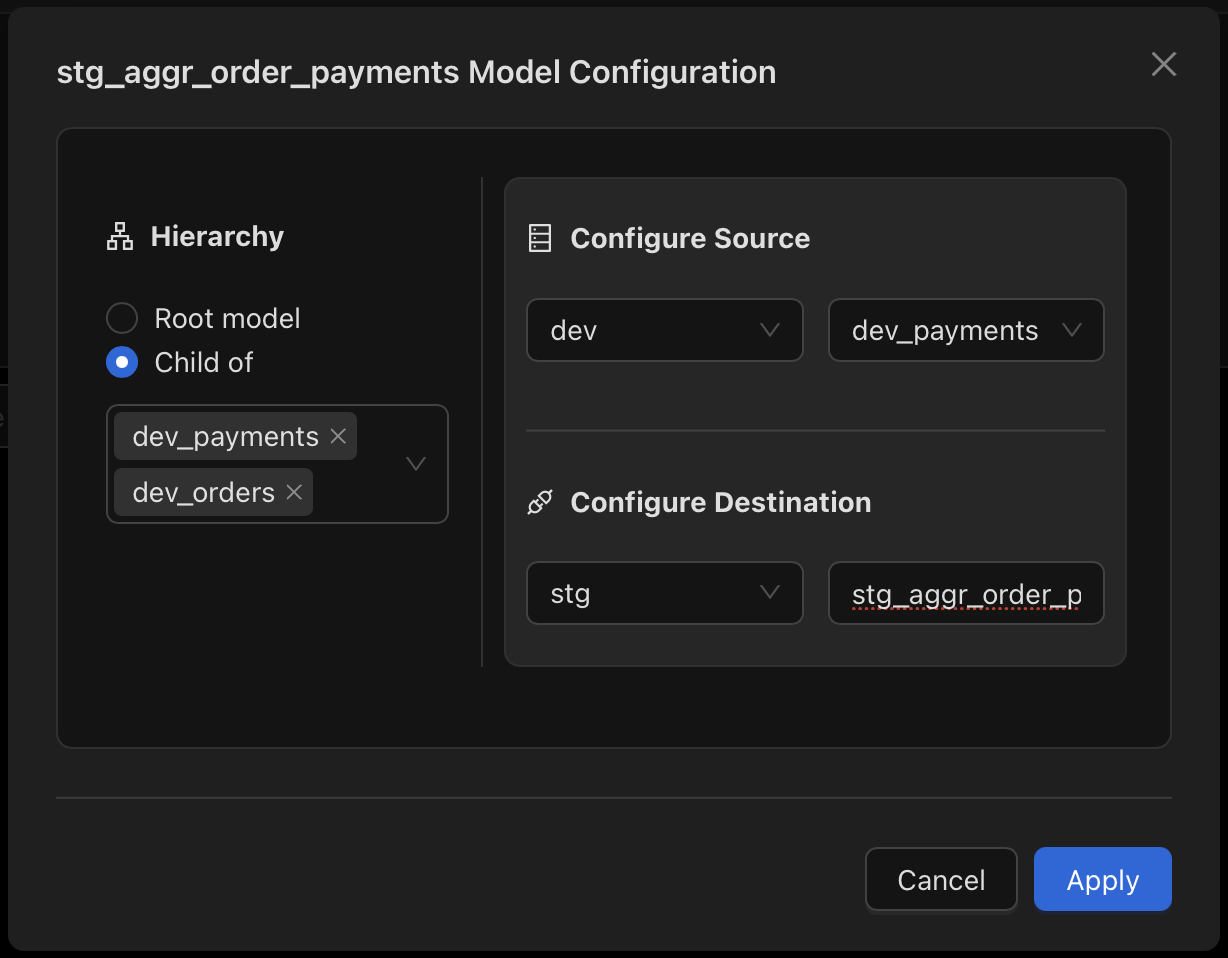
So far, all the models we created are root models in the dev schema. Meaning, they have no dependencies on other models. This is the first intermediate model we'll create. To create a new model, we'll right-click on the no-code folder in the left sidebar and select New Model. For Heirarchy, we'll select Child Of, rather than Root model and specify this mode's dependencies: dev_payments and dev_orders.
Setting up the model
Let's set the source schema to dev and the source table to dev_payments. Since we're now dealing with stage models, we'll set the destination schema to stg. We'll be using this schema for all the stage models we create. Let's specify the destination table to stg_aggr_order_payments. Clicking on Apply will create the model, but we're not done yet. We'll need to set up the joins before we can start creating the transformations.
Setting up the joins
Joins in Visitran are very simple to set up. We'll be joining the dev_payments model with the dev_orders model on the order_id column. Let's see how to do that.
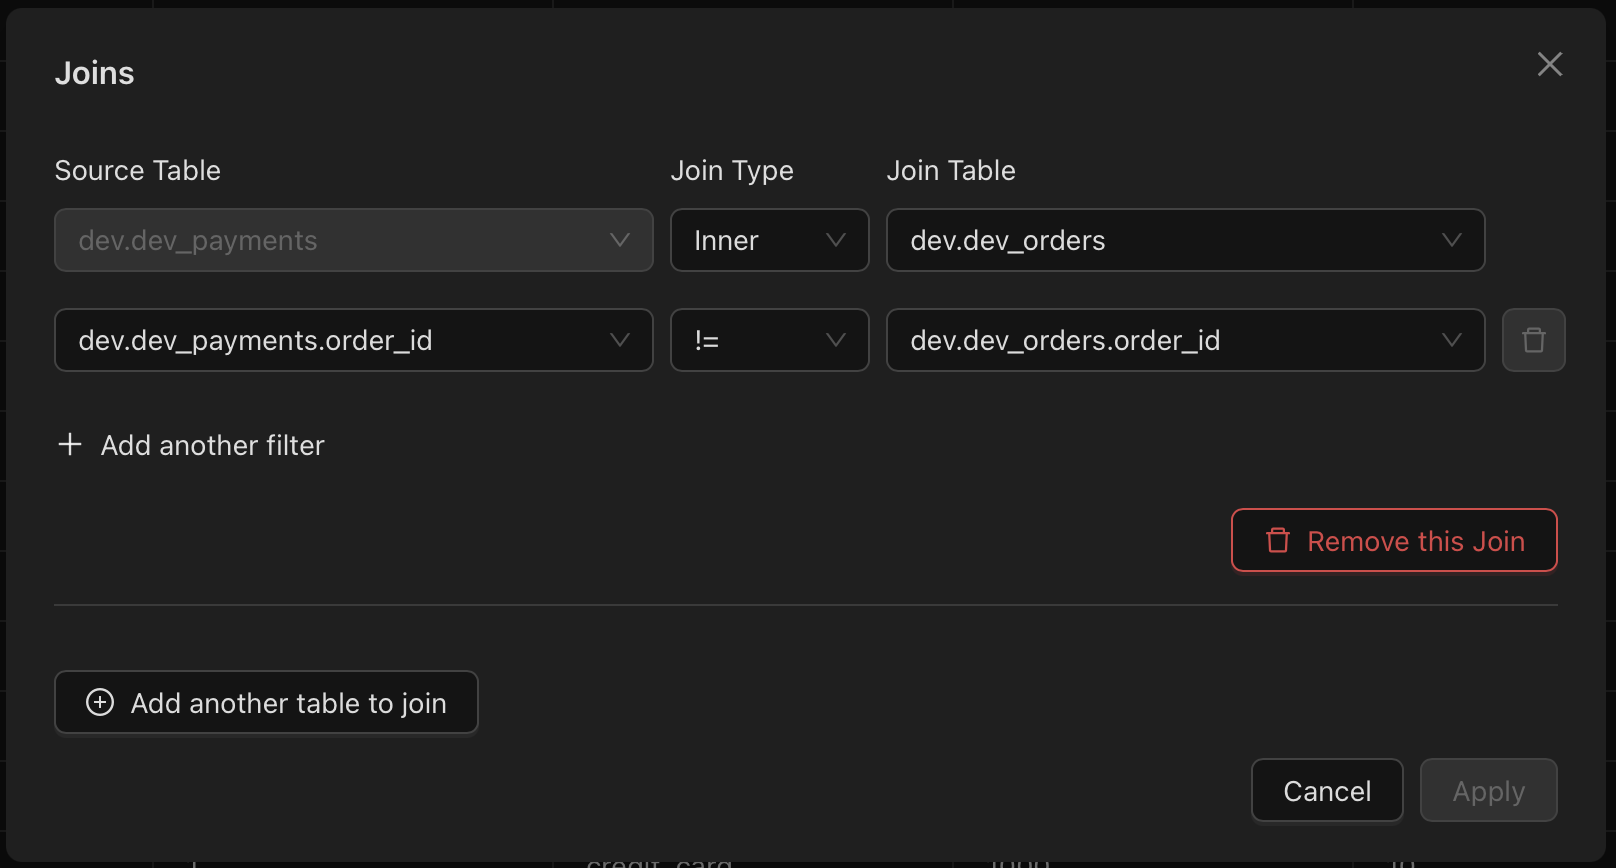
From the screenshot above, we can see that the first row specifies the tables and the join type. The second row specifies the join condition. Let's set up the joins as shown in the screenshot. Clicking on Apply will create the joins and you can now see the joined data in the data grid.
Setting up the transformations
In this model, as you can recall, we wanted to aggregate payments by customer_id. To this effect, we'll need to add one aggregation column and another transformation to sort by customer_id.
Setting up the aggregation column
To get started, click on the Aggregator button of the data model. This will bring up the aggregation dialog.
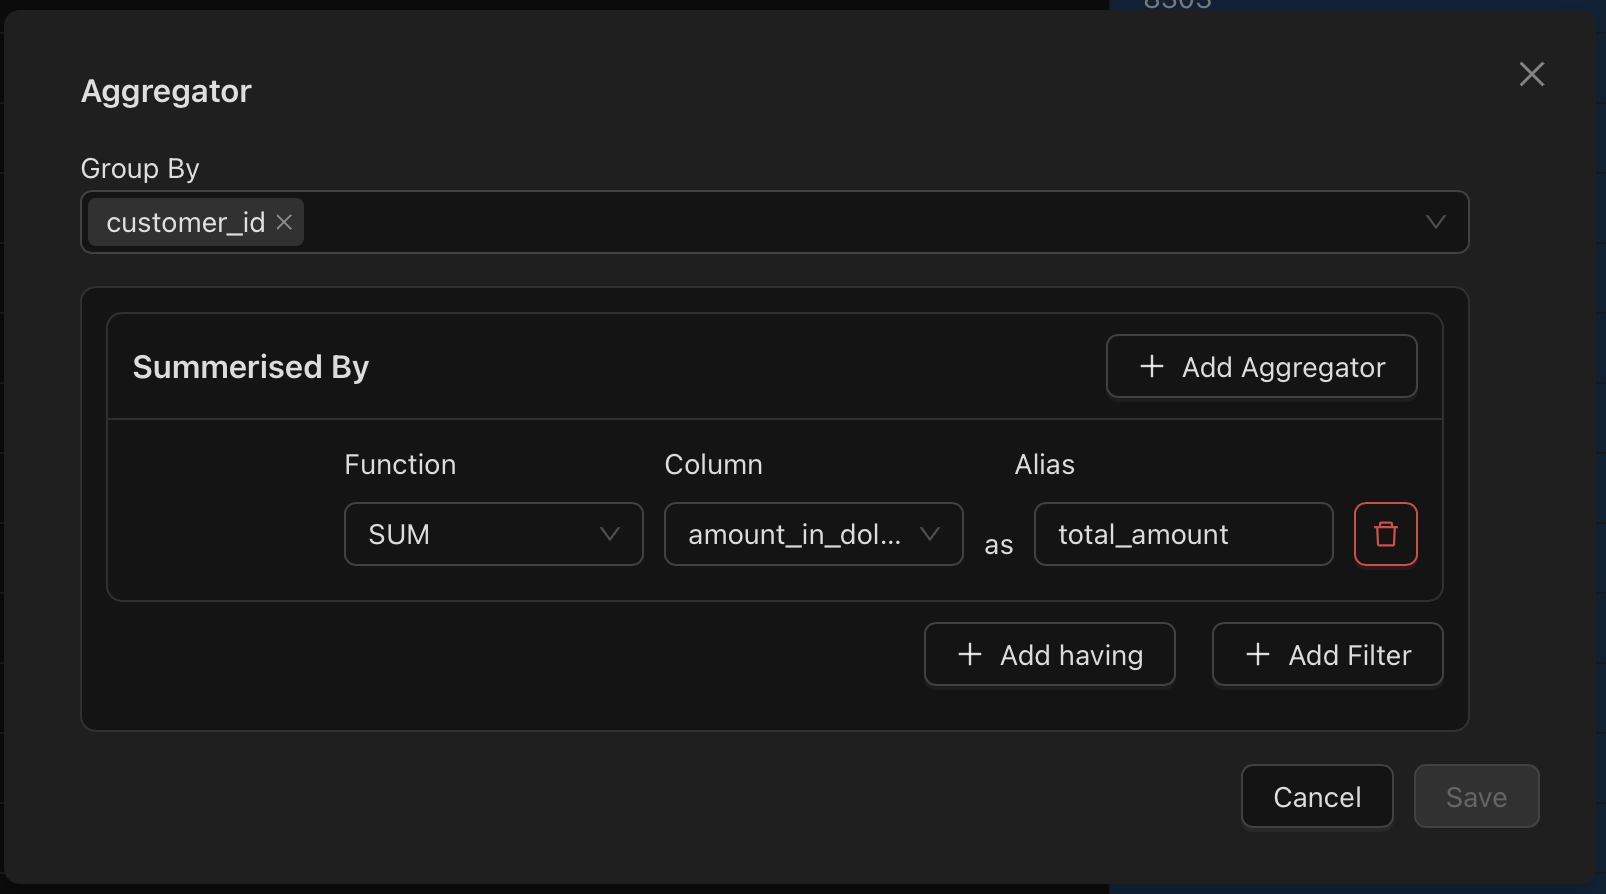
Specify the customer_id in the Group By option and then click on Add Aggregator. Then, enter the following values:
- Function:
SUM - Column:
amount_in_dollars - Alias:
total_amount
Now, click on Save to save the aggregation column. You should now see the aggregated data in the data grid.
Setting up the sort column
Let's sort the data by customer_id.
Click on the Sort button of the data model. This will bring up the sort dialog.
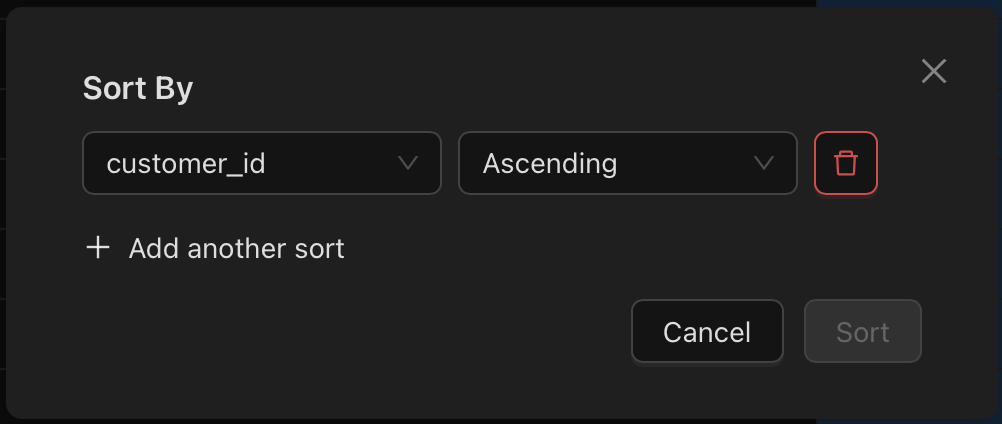
Enter the following values:
- Sort By:
customer_id - Order:
Ascending
Now, click on Sort to save the sort column. You should now see that the aggregated data is sorted by customer_id.
The final model
Let's look at the final model.
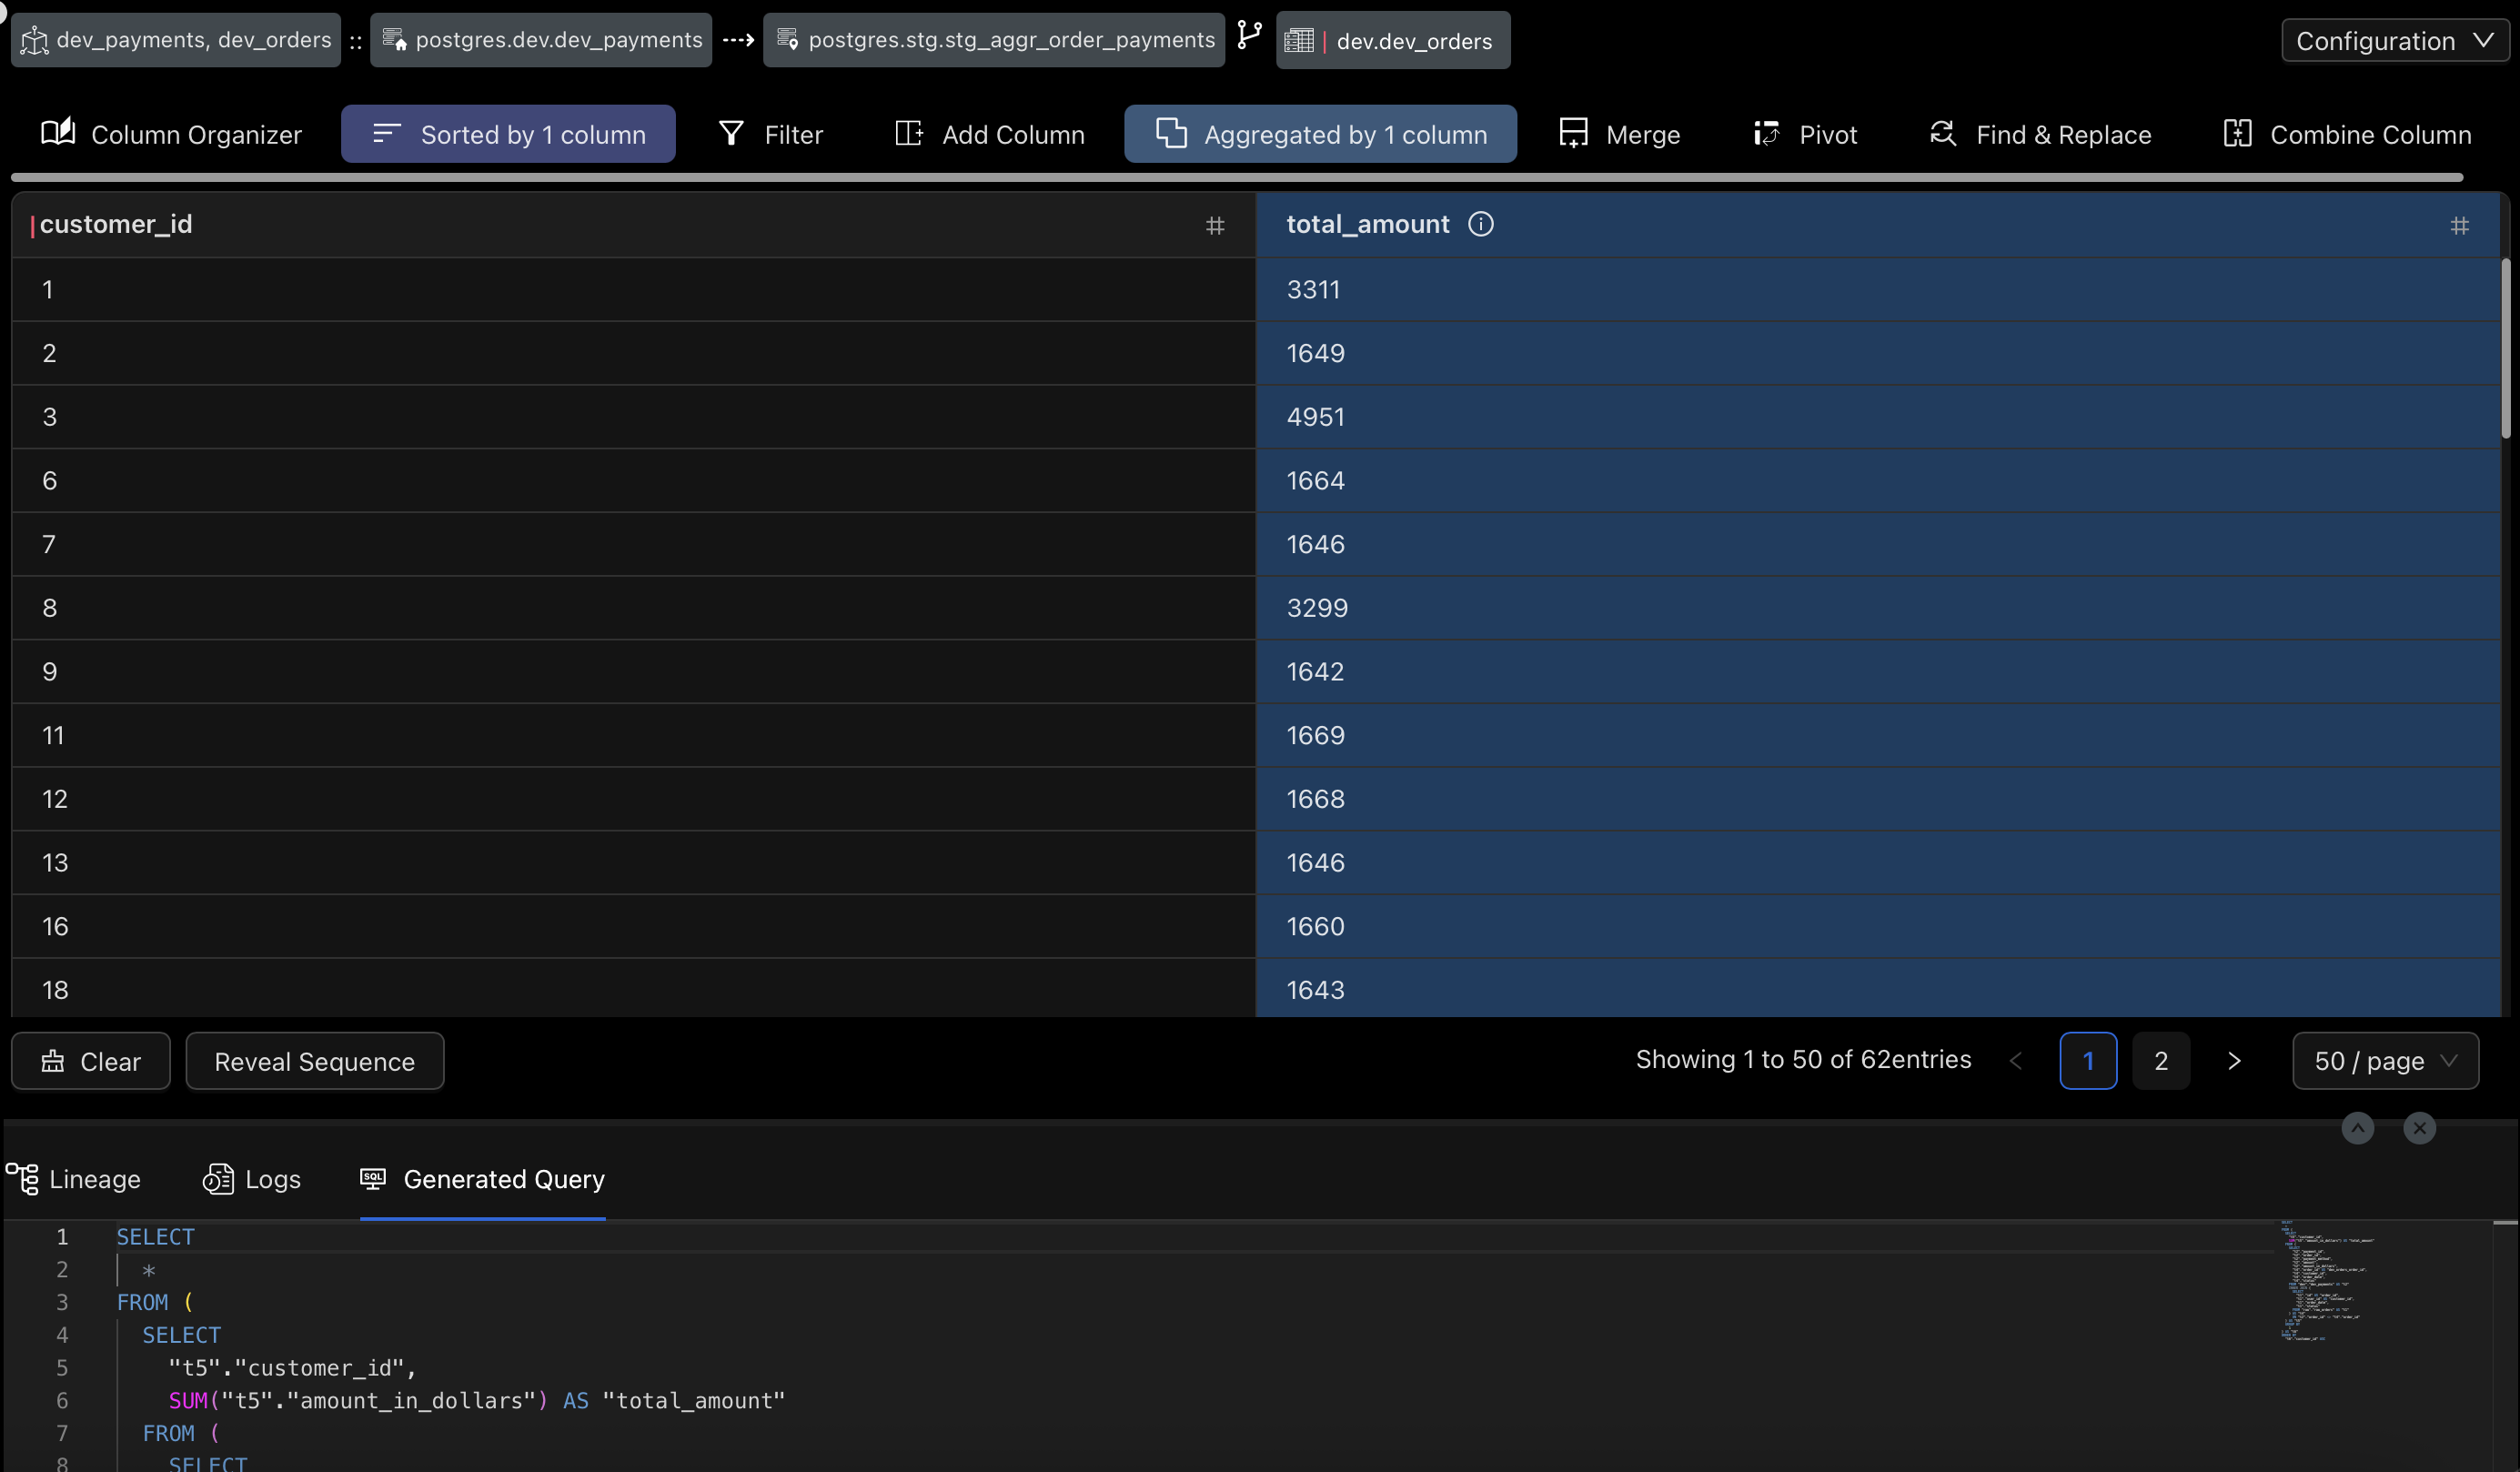
Some points to note here:
- You can see the detailed of the joined tables on the top
- The
customer_idcolumn header has a color indicator (red) that matches the indicator on the joins info header and shows us that it comes from thedev_orderstable. - The Sort and Aggregator buttons are now shown in a different highlight color with the newly added aggregation column the same color as the Aggregator button.
- The Sort and Aggregator buttons also show the number of columns they have added or have influence on.
- We can view the generated SQL query for all the actions we took via the no-code interface.